
Compressed air systems look benign, but anyone who has had a tube whip out of a push-to-connect fitting under pressure knows the energy stored in air can turn small mistakes into serious incidents. In production, I see most fitting-related injuries and downtime trace back to rushed isolation, contaminated sealing surfaces, and mismatched replacements. The good news: with disciplined lockout/tagout, clean installation technique, and verification, you can replace fittings quickly without risking people or throughput.
Lockout and depressurize the entire line; verify zero pressure at multiple points. Use proper tube cutters, flare-nut or crows-foot wrenches, and soft-jaw pliers to avoid scratching or ovalizing threads. Confirm fitting type, material, pressure rating, thread standard, and torque specs before installing with compatible PTFE tape or anaerobic sealant on male threads only. Finish with a leak test (soapy solution and/or ultrasonic detector), gradual re-pressurization, and re-torque if required before restarting production.
What follows is the exact procedure I recommend on plant floors—grounded in OSHA LOTO requirements and the failure modes I’ve seen in push-in, compression, barbed, and threaded connections across general industrial, food, and packaging environments.
What lockout and depressurization steps should I follow before removal?
In my experience, 80% of “surprise” incidents happen because a line was isolated upstream but residual air remained trapped downstream in accumulators or branch circuits. Treat every pneumatic section like a charged spring until you have hard proof of zero energy.
Step-by-step LOTO and depressurization
Identify the circuit
- Trace the line from the faulty fitting to its upstream isolation valve and downstream actuators, accumulators, and branch tees.
- Note any secondary sources (portable bottles, nitrogen feeds, bypass lines).
Shutdown and isolate
- Stop the compressor and close the main plant air valve feeding the area.
- Close local branch isolation valves around the target section.
- If present, actuate dedicated exhaust/vent valves for that leg.
Apply Lockout/Tagout
- Fit ball valve lockouts or lockable hasps on isolation valves; tag with “Do Not Operate.”
- If hoses are disconnected, apply quick-disconnect lockouts.
- Each authorized worker places their own lock.
Depressurize slowly
- Open bleed/exhaust valves gradually to prevent hose whip or debris ejection.
- Drain receivers and accumulators in the affected circuit.
- Vent both upstream and downstream sides of the fitting.
Verify zero energy state
- Check a calibrated gauge at the nearest port—pressure must read 0 psig/bar.
- Bleed residual pockets at branch lines and dead-legs.
- Attempt to cycle actuators; no movement should occur.
- Listen for hissing; if present, continue venting.
- Only when all points confirm zero pressure do you proceed.
PPE that’s non-negotiable
- Safety glasses with side shields (pressurized debris is a projectile hazard).
- Cut-resistant gloves (sharp tube cuts and metal burrs).
- Hearing protection during venting in high dBA zones.
Common pitfalls I watch for
- Assuming a closed ball valve equals zero energy.
- Forgetting to vent accumulators or secondary feeds.
- Removing push-in tubing before fully depressing the release collar.
Which tools help me avoid scratching or ovalizing threads during disassembly?
Scratched sealing faces and ovalized threads are silent leak creators. Most “mysterious” post-replacement leaks I audit stem from tool damage or reusing marred tubing. Use tools that control torque and contact geometry.
Essential tools for damage-free disassembly
- Tubing cutter (ratcheting or guillotine style)
- Produces square, burr-free cuts without crushing the OD.
- Deburring tool or fine reamer
- Cleans ID/OD to prevent O-ring shaving and micro-leaks.
- Flare-nut wrenches or crows-foot wrenches
- Distribute load on hexes; reduce rounding and thread misalignment.
- Soft-jaw pliers or aluminum jaw inserts
- Grip without marring nickel-plated brass or stainless bodies.
- Hex key sets and torque wrenches (inch-lb/N·m)
- Control tightening torque on compression nuts and threaded adapters.
- Nylon/plastic picks
- Remove O-rings and collets without scratching grooves.
- Lint-free wipes and isopropyl alcohol
- Clean mating surfaces; oil and dust undermine seals.
Handling tips that prevent damage
- Support the fitting body with a backup wrench while loosening the mating nut.
- Pull push-to-connect tubing straight while fully depressing the release ring—no twisting.
- Never use pipe wrenches on precision fittings; their serrations gouge surfaces.
- Cap open lines promptly to keep out dust and moisture.
Quick reference: tool choice by fitting type
| Fitting type | Best removal tools | Common damage to avoid |
|---|---|---|
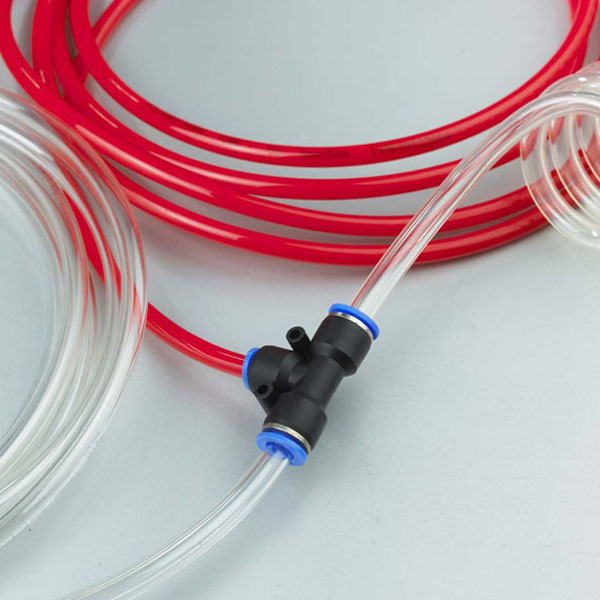
| Push-to-connect | Hand pull + release ring; soft jaws | Scratched tube OD; nicked collet; bent release ring |
| Compression (ferrule) | Flare-nut wrench + torque wrench | Over-torqued ferrule; rounded hex; ovalized threads |
| Barbed with clamp | Side cutter for clamp; soft jaws | Tube tearing; barb gouging |
| Threaded NPT/BSPP/BSPT | Box-end/crows-foot + backup wrench | Thread galling; sealing face scratches |
How do I verify compatibility and torque specs before installing replacements?
Before any install, I confirm five things: fitting type, tube size, thread standard, material and seal compatibility, and pressure rating. Skipping any one of these invites leaks, blow-offs, or accelerated corrosion.
Fit and function checks
Fitting type and tube OD
- Match push-to-connect, compression, barbed, or threaded style to the design.
- Verify tube OD/ID tolerance (e.g., polyurethane ±0.15 mm; nylon ±0.10 mm).
Thread identification
- NPT: tapered, 60° thread; seal with PTFE tape or anaerobic pipe sealant.
- BSPP (G): parallel; seal via bonded washer/O-ring face (no tape on parallel threads).
- BSPT: tapered; similar sealing approach to NPT.
- Use thread gauges if unsure; avoid cross-threading by mixing NPT and BSP.
Material and seal compatibility
- Media: instrument air, oil mist, or inert gas; check elastomer compatibility (NBR, FKM).
- Environment: select nickel-plated brass or 316 stainless in wet or corrosive areas; FDA-compliant or NSF-51 materials for food zones.
- Temperature and UV: polyurethane softens with heat; nylon/PE handles higher temps.
Pressure rating vs. system
- Ensure fitting and tubing max working pressure exceeds operating pressure with margin (e.g., 1.5×).
- For high-pressure or pulsing applications, prefer compression fittings over push-in.
Cleanliness and dryness
- Wipe mating surfaces; moisture and oil contaminate seals and thread lockers.
Sealant application rules
- Apply sealant only to male tapered threads (NPT/BSPT).
- PTFE tape: 2–3 wraps, clockwise, starting one thread back from the end; keep tape out of the air path.
- Anaerobic sealant: pneumatic-compatible, medium strength; avoid excess that could migrate.
- Do not tape parallel threads (BSPP); seal at the face with O-ring/bonded washer.
Torque specifications and insertion depths
Manufacturers publish torque ranges—always defer to the datasheet. As a general field reference for compression nuts on small-bore pneumatic lines:
| Nominal size (tube/port) | Typical compression nut torque (N·m) | Notes |
|---|---|---|
| 1/16″–1/8″ | 7–9 | Start low; check for seal, then verify |
| 1/4″ | 12–14 | Avoid ferrule over-compression |
| 3/8″ | 22–24 | Use torque wrench with backup spanner |
| 1/2″ | 28–30 | Re-check after first pressurization |
Push-to-connect insertion depth varies by brand; mark the tube with the specified depth, insert to hard stop, then pull back lightly to confirm collet grip.
Replace small parts proactively
- Swap O-rings, ferrules, and collets when changing fittings; worn micro-components are a common root cause of recurring leaks.
- Use OEM kits to match durometer and material.
What leak tests confirm successful replacement before restarting production?
A leak-free install saves energy and headaches. I run a two-step test: visual/soap test at low pressure, then ultrasonic survey at operating pressure, followed by functional checks and documentation.
Commissioning sequence
Remove LOTO and restore air gradually
- Open isolation valves slowly; use soft-start valves if available.
- Monitor gauges as pressure ramps; pause at 25–50% operating pressure.
Soapy solution test
- Brush or spray a mild surfactant on each connection.
- Watch for bubbling; micro-bubbles indicate a small leak. Clean and re-seat or re-torque.
Ultrasonic leak detection
- At full operating pressure, use an ultrasonic detector to scan joints and manifolds.
- Log decibel levels and locations for future audits.
Functional test
- Cycle actuators; confirm normal speed and end-of-stroke positions.
- Check for tube creep in push-in fittings; reinsert if needed.
Re-torque and re-check
- For compression fittings, re-verify torque after the first pressurization/thermal cycle.
Documentation
- Record fitting type, material, torque values, and test results.
- Tag lines with pressure ratings; schedule the next leak audit.

Leak test options compared
| Method | Sensitivity | Best use case | Pros | Cons |
|---|---|---|---|---|
| Soapy solution | Good (visible bubbles) | Quick checks on new installs | Low cost, simple | Messy; limited in noisy areas |
| Ultrasonic detector | Excellent (micro-leaks) | System-wide audits at full load | Quantifiable, fast surveys | Requires instrument/training |
| Pressure decay (gauge) | Moderate | Enclosed circuits with isolation | Quantifies total leakage | Doesn’t localize the leak |
Hands-on removal and installation tips by fitting type
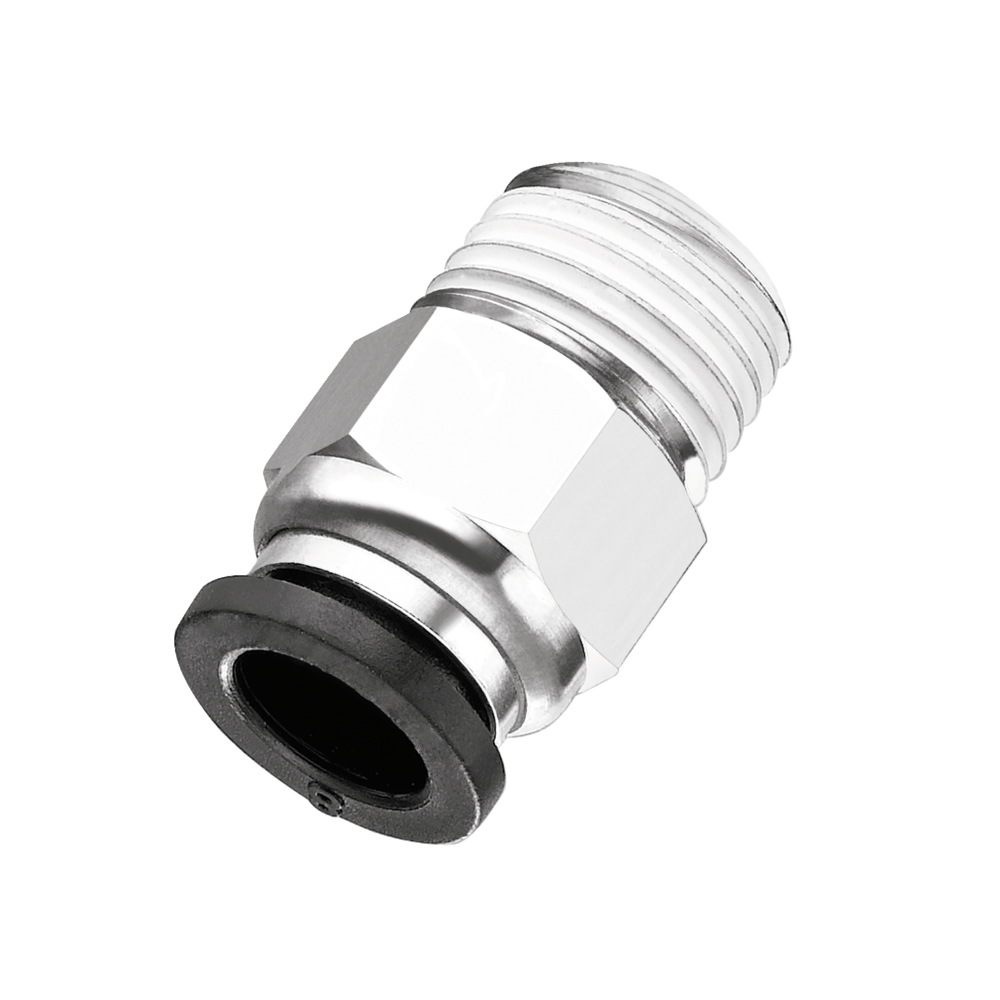
Push-to-Connect
- Removal: Depressurize; fully depress release ring; pull tube straight. Clean the tube end; discard if scratched or ovalized.
- Install: Cut square, deburr, mark insertion depth, insert to hard stop, then perform a gentle pull-back test. Verify collet O-ring condition.
Compression (Ferrule)
- Removal: Back up the body with a wrench; loosen with a flare-nut wrench to prevent hex rounding.
- Install: Slide nut and ferrule correctly; seat tube fully; tighten to spec. Over-torque thins the tube wall and creates leaks.
Barbed with Clamp
- Removal: Cut the clamp; twist and pull tube off gently to avoid barb damage.
- Install: Use correct clamp type/size; avoid worm-drive over-crush on soft tubing.
Threaded Adapters (NPT/BSPT/BSPP)
- Removal: Use a box-end or crows-foot with backup wrench; avoid pipe wrench serrations.
- Install: Apply compatible sealant to male tapered threads only; align threads carefully; torque to spec; don’t tape parallel threads.
Contamination control that actually matters
- Clean and dry: Oil, dust, and water compromise elastomer seals and thread lockers. Wipe parts with IPA; blow out line debris after cutting.
- Air quality: Maintain 5-micron filtration; drain bowls routinely; use dryers to prevent condensate ingress.
- Environment-specific selection: 316 stainless and FKM seals for washdown/chemicals; antistatic fittings for powder handling; FDA-compliant materials for food packaging.
At-a-glance checklist: safe fitting replacement
| Step | Action | Verified? |
|---|---|---|
| Isolate and LOTO | Lock main/branch valves; tag; personal locks applied | ☐ |
| Depressurize | Bleed upstream/downstream; drain accumulators | ☐ |
| Zero pressure verification | Gauge reads 0; no motion/hissing; attempt controls | ☐ |
| PPE | Glasses, cut-resistant gloves, hearing protection | ☐ |
| Identify and match components | Type, tube OD, thread standard, material, pressure rating | ☐ |
| Prepare surfaces | Cut square, deburr, clean/dry mating areas | ☐ |
| Sealant application | Correct for thread type; avoid air path contamination | ☐ |
| Torque/insertion depth | Tighten to spec; mark and confirm push-in depth | ☐ |
| Leak testing | Soapy solution; ultrasonic at operating pressure | ☐ |
| Documentation | Record torque, materials, test outcomes; tag pressure | ☐ |
Conclusion
Replacing faulty pneumatic fittings safely is less about fancy hardware and more about disciplined process: isolate, depressurize, verify zero energy, install cleanly with compatible components, and test methodically. In our experience, the biggest ROI comes from preventing rework—choose the right fitting type and material up front, control torque, and keep contamination out of seals. The key is consistent inspection and proper component selection, backed by documented leak audits. Do that, and you’ll cut energy waste, extend component life, and keep your people safe while your lines stay productive.
