
How do over-torque, cross-threading, and misalignment damage my fittings?
I’ve seen far too many fittings fail not because the product was subpar, but because installation practices quietly built-in stress that later showed up as cracks, leaks, or distorted bodies. In my experience, teams are under pressure to get machines back online, and hand tools don’t give feedback like a torque wrench does. Combine that with mixed thread standards, side-loaded tubing, or hurried tube cuts and you’ve got microcracks and seal distortions that only reveal themselves after a few weeks of cyclic pressure. The pain point is predictable: intermittent leaks, creeping downtime, and finger-pointing between maintenance and purchasing.
Over-torque, cross-threading, misalignment, incompatible materials, chemical and UV exposure, temperature extremes, pressure spikes, vibration, and poor tube preparation all initiate microcracks or deformation in fittings and seals. These stresses accumulate under cyclic pressure and thermal cycling, leading to brittle fracture or creep deformation. Correct torque control, material compatibility, environmental shielding, surge mitigation, and proper routing/support typically eliminate 80–90% of these failures.
To get practical, I’ll walk through the mechanical, environmental, and hydraulic loading mechanisms that drive cracking and deformation, then translate that into actionable redesign and maintenance steps. I’ll also share how I select materials and fittings for aggressive media, and the support/routing changes that measurably cut stress at the connector.
Failure mechanics from installation errors
Over-torque and thread damage
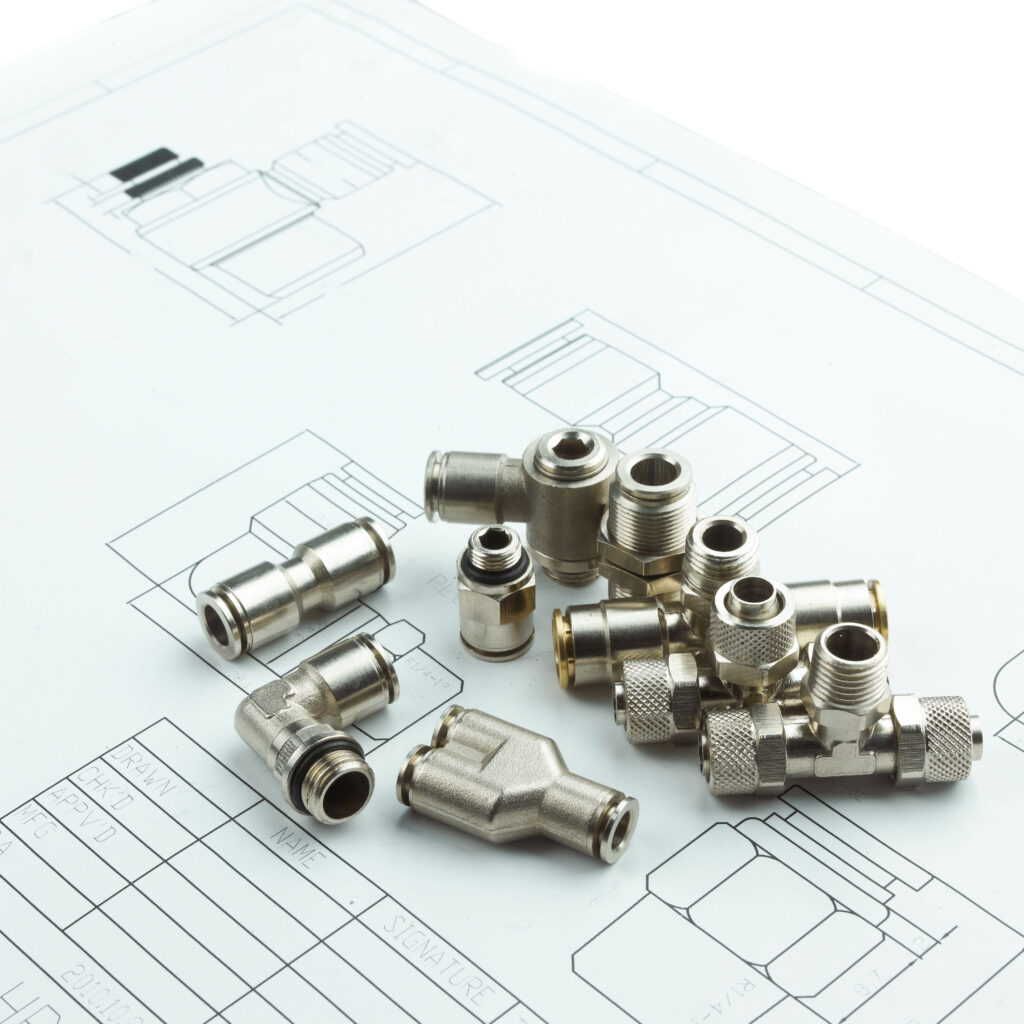
When I over-torque a tapered thread (NPT/BSPT), hoop stress and thread flank compression generate radial cracks at the thread root—especially in brass, zinc diecast, and plastics. On parallel threads (BSPP/metric), excessive torque distorts the sealing face or crushes bonded seal/O-ring grooves. Push-in collars aren’t immune: tightening the body into a manifold while the tube is already inserted can load the collet unevenly, inducing microcracks that propagate under cyclic pressure.
- Cross-threading cuts new, asymmetric thread paths that concentrate stress on a few teeth; the joint may “feel” tight but is structurally compromised.
- Mixed thread standards (e.g., attempting NPT into BSPP) force misfit engagement and uneven stress distribution; sealants can mask the problem temporarily while damage accumulates.
Recommended practice:
- Use manufacturer torque specs and apply a calibrated torque wrench on metal threads; for plastics, torque-limiting drivers and snug, not “crush.”
- Verify thread type and pitch; add thread gauges to the toolbox and segregate fittings by standard to prevent mix-ups.
- Use appropriate seal method: PTFE tape for tapered threads (2–3 wraps, no overbuild), bonded seals or dowty washers for parallel threads, and avoid stacking sealants.
Misalignment and side-loading
Side-loaded tubing translates bending moments into the fitting body and ferrule. I’ve traced cracked push-in fittings to a simple 10–15° misalignment: the tube was “almost straight,” but vibration turned that bending into high-cycle fatigue.
- Incomplete insertion or burred/angled tube ends concentrate stress at the O-ring and collet teeth, mis-seating the seal and gouging the bore.
- Repeated connect/disconnect cycles wear the collet and O-ring; the fitting will “hold” but can’t maintain airtightness under pulsation.
Recommended practice:
- Square-cut tubing with a sharp cutter; deburr OD, blow out particulates, and confirm full insertion (feel the second stop).
- Add strain reliefs and grommets; avoid tight radii near the fitting.
- For rigid lines, use alignment sleeves or swivel fittings where motion exists.
Are chemicals, heat, or UV contributing to material degradation in my environment?
Chemical and UV attack on polymers and elastomers
Oils, solvents, ozone, and cleaning agents extract plasticizers or chemically attack polymer chains in nylon, PU, acetal, and ABS fitting bodies and seals. I’ve seen PU tubing go glassy and crack in ozone-rich environments and acetal push-ins embrittle under chlorinated solvent exposure. UV accelerates this: outdoor lines or near UV-curing stations yellow and craze, then fail under normal operating pressure.
- EPDM swells with certain oils; NBR suffers with ozone; FKM (Viton) resists many solvents but can harden at low temperatures.
- O-rings lose elasticity over time; aged polymers become brittle and crack at normal pressure.
Temperature extremes and differential expansion
Thermal cycling creates differential expansion between dissimilar materials (e.g., brass bodies with plastic sleeves, aluminum manifolds with stainless fittings). The result is seal extrusion, stress at interfaces, and eventually cracking at the thread base or molded transitions. Cold starts plus moisture can freeze micro-pools inside fittings, prying apart sealing surfaces. Heat softens plastics and reduces pressure rating; repeated cycles accelerate fatigue.
Mitigation steps:
- Match material to media: stainless steel 316L and PTFE for aggressive chemicals; brass or anodized aluminum for clean, dry air; acetal/nylon only in benign environments with UV shielding.
- Choose seals for media and temperature: FKM for solvents/heat, EPDM for ozone, NBR for general oils; check compatibility charts per ISO 11114 guidance.
- Shield plastics from UV; add covers or move lines away from curing lamps and sunlight.
- Control air quality: use FRL units with coalescing filters and desiccant or membrane dryers to reduce oil/solvent carryover and moisture.
Can pressure spikes or mechanical stress from tubing pull-out deform my connectors?
Pressure spikes, pulsation, and water hammer
Even if your average line pressure is within spec, transient spikes (solenoid slam, quick exhausts, long runs with sudden valve closures) can exceed working pressure by 2–3× for milliseconds. Brittle or fatigued components crack at stress risers (threads, molded transitions). Push-in seals can momentarily extrude and then nick on reset, leading to progressive leakage.
- Pulsating compressors or rapid-cycling actuators induce high-cycle fatigue at fittings; the crack initiates microscopically and grows until you finally notice the leak.
- Long vertical drops with condensate can create slug flow; when moved, water hammer loads fittings.
Mechanical pull-out and vibration
Tubing tension, whipping, or poor routing adds axial and bending loads. The collet teeth can cut into the tube OD; once the tube ovalizes, the seal loses compression and the body distorts. Vibration loosens threaded joints over time; micro-slip at the interface slowly backs off threads and “frets” sealing faces.
Mitigation:
- Add accumulators or flow restrictors to soften spikes; choose valves with soft-seal or controlled closing profiles; use quick exhausts judiciously.
- Dampen vibration with supports, clamps, and isolation mounts; consider swivel or spring guards for dynamic axes.
- Verify safety factor: target 3–4× between burst and max spikes; if you can’t characterize spikes, instrument a sample line with a fast pressure transducer.
Material and rating selection table
| Application condition | Recommended fitting body | Seal/O-ring | Notes |
|---|---|---|---|
| Clean, dry shop air, indoor | Brass or nickel-plated brass | NBR | Good general purpose; avoid ozone-heavy areas |
| Ozone/UV exposure | Stainless steel or UV-stabilized polymers | EPDM | Shield plastics; EPDM resists ozone |
| Solvent/oil mist, aggressive media | 316L stainless or PTFE-lined | FKM (Viton) | Check chemical compatibility; avoid acetal |
| High pulsation/vibration | Stainless or anodized aluminum + swivel features | FKM or NBR with backup rings | Add clamps/isolators; consider compression fittings |
| Low temperature cycling | Metals with flexible seals | Silicone or low-temp FKM | Avoid PU tubing; manage moisture to prevent freezing |

How can I redesign supports and routing to reduce stress on my fittings?
Routing fundamentals I apply
- Keep straight runs into fittings: aim for ≤5° misalignment at the port; add elbow/swivel fittings if direction change is unavoidable.
- Respect minimum bend radius of tubing; position bends at least 3–5 tube diameters away from the fitting to avoid collar loading.
- Decouple motion: on moving axes, use service loops, strain relief boots, and rotating/swivel connectors to prevent torsion.
Support and vibration control
- Clamp spacing: for small OD tubing (4–8 mm), support every 0.5–1.0 m; for larger OD or high-vibration, reduce spacing to 0.3–0.5 m. Use cushioned P-clamps to avoid point loads.
- Isolate sources: mount manifolds and FRLs away from motors or add elastomer mounts. Use rigid brackets for valves to prevent cantilevering on a single fitting.
- Prevent pull-out: add grommets at panel pass-throughs; use locking push-in fittings or compression fittings where axial loads are expected.
Installation QA checklist I use
- Confirm thread type and torque spec; log torque values for critical ports.
- Cut, deburr, and clean tube ends; verify full insertion depth by marking the OD before assembly.
- Check media compatibility for body and seals; document chemical exposure zones.
- Instrument for spikes during commissioning; set regulator and relief valve strategy accordingly.
- Audit UV/ozone exposure; add shielding or relocate susceptible polymers.
Pros/cons of fitting types for stressed installations
| Fitting type | Pros | Cons | Where I choose it |
|---|---|---|---|
| Push-in (plastic body) | Fast install, low weight | UV/chemical sensitivity, lower torque tolerance | Benign environments, low vibration |
| Push-in (brass/stainless body) | Better mechanical strength, higher pressure | Higher cost, potential galvanic issues on aluminum | General industrial, moderate vibration |
| Compression | Strong axial retention, good for vibration | Slower install, requires precise tube prep | High vibration or pull-out risk |
| Swivel/rotary | Decouples motion, reduces side load | Seal wear over time, cost | Moving axes, robotics |

Conclusion
In my experience, cracked or deformed pneumatic fittings almost always trace back to a combination of installation stress (over-torque, misalignment, poor tube prep), environmental attack (chemicals, UV, ozone, temperature), and transient hydraulic loads (pressure spikes, pulsation). Those mechanisms don’t usually cause instant failure—they seed microcracks and seal damage that grow under cyclic pressure and thermal swings until leaks and fractures appear. When I control torque and thread standards, select materials compatible with the media and environment, mitigate spikes and vibration, and redesign supports and routing to keep loads off the connector, fitting failures drop dramatically. Treat connectors as mechanical components with defined loads and material limits—engineer the joint, not just the line—and you’ll eliminate the vast majority of cracking and deformation issues.
